Have you ever struggled choosing the right drill bit for your woodworking projects?
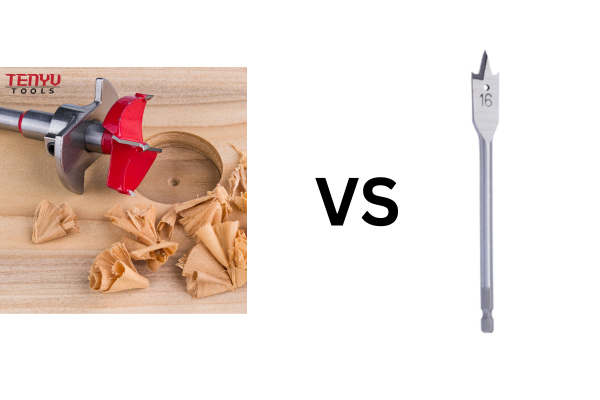
Choosing between a Forstner bit and a spade bit can significantly impact the quality and efficiency of your mortise cuts.
Understanding the differences is crucial for achieving precise and clean results in your woodworking endeavors.
Spade Bit or Forstner Bit for Mortises?
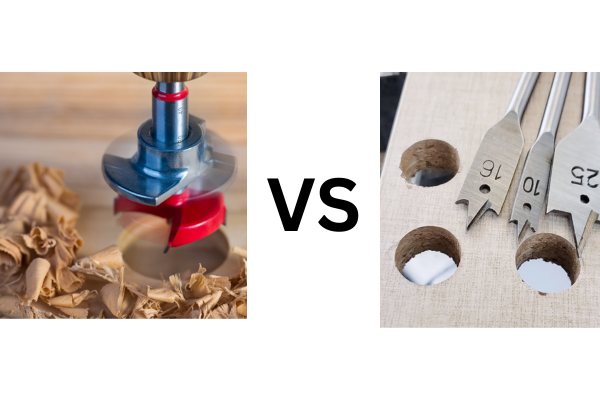
Are you unsure which bit to use for creating mortises in your woodworking projects?
Forstner bits are generally preferred over spade bits for mortises due to their precision and clean cuts.
Let’s explore why choosing the right bit matters for your mortising tasks.
When working on mortises, precision is key to ensuring that the joints fit perfectly and the overall structure is sturdy. Spade bits are known for their affordability and speed, making them a popular choice for rough cuts. However, they often leave rougher edges and can be less accurate compared to Forstner bits. Forstner bits, on the other hand, provide cleaner and more precise cuts, which are essential for high-quality mortises. Additionally, Forstner bits create flat-bottomed holes with smooth sides, reducing the need for additional finishing work. While Forstner bits are typically more expensive and require more effort to use, the benefits they offer in terms of accuracy and finish quality make them a better choice for professional woodworking projects. By investing in the right bit, you can save time and materials in the long run, ensuring that your mortises are both functional and aesthetically pleasing.
What is Wood Spade Bit?
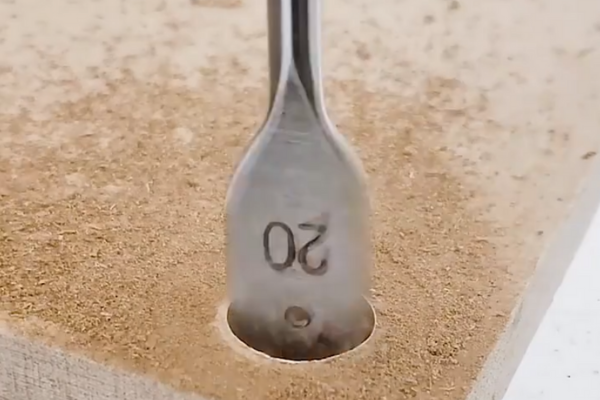
Do you know what a wood spade bit is and how it differs from other drill bits?
A wood spade bit is a flat, paddle-shaped drill bit used for drilling large, shallow holes in wood quickly and efficiently.
Let’s delve into the specifics of spade bits and their applications.
Wood spade bits, also known simply as spade bits, are a staple in many woodworking toolkits due to their simplicity and effectiveness. These bits feature a flat, paddle-like shape with a sharp point in the center and cutting edges on either side. They are designed to rapidly remove material, making them ideal for creating large, shallow holes in wood. Spade bits are commonly used for tasks such as installing electrical wiring, plumbing, and shelving, where speed and efficiency are more important than precision. One of the main advantages of spade bits is their affordability and ease of use, which makes them accessible to both professional carpenters and DIY enthusiasts. However, they do have some limitations. The holes produced by spade bits are typically rougher and less precise compared to those made with Forstner or auger bits. This can necessitate additional finishing work to achieve a smooth and accurate fit, especially in high-quality woodworking projects. Additionally, spade bits can be more prone to wandering, which may result in less accurate placement of holes. Despite these drawbacks, the versatility and speed of spade bits make them a valuable tool for a wide range of woodworking applications.
Advantages of Spade Bits
- Speed1: Quickly drills large holes.
- Cost-Effective: Generally cheaper than other specialized bits.
- Versatility: Suitable for various woodworking tasks.
Disadvantages of Spade Bits
- Precision: Less accurate, rougher holes.
- Finish: May require additional sanding or finishing.
- Stability: Prone to wandering during drilling.
What is the Purpose of Using a Spade Drill Bit?
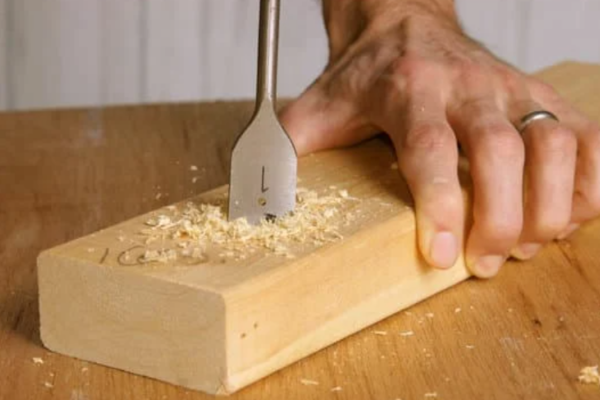
Why do woodworkers choose to use spade drill bits in their projects?
Spade drill bits are chosen for their ability to quickly create large holes, making them ideal for tasks that require speed and efficiency.
Let’s examine the specific purposes and benefits of using spade drill bits in woodworking.
Spade drill bits serve a unique role in woodworking by providing a fast and efficient means of creating large, shallow holes in wood. Their design allows them to remove a significant amount of material quickly, which is particularly useful in projects where multiple large holes are needed, such as in shelving, cabinetry, or electrical installations. The primary purpose of using a spade drill bit is to save time during the drilling process. Unlike other bits that may require more passes to achieve the desired hole size, spade bits can often accomplish the task in fewer strokes, increasing overall productivity. Additionally, spade bits are relatively easy to use, making them accessible to both novice and experienced woodworkers. They do not require specialized equipment or techniques, allowing for straightforward integration into various woodworking projects. Another important purpose of spade drill bits is their ability to create holes that are larger than what standard twist bits can achieve. This makes them indispensable for tasks that involve running wires, pipes, or other large components through wooden structures. However, while spade bits excel in speed and efficiency, they are not always the best choice for applications where precision and a clean finish are paramount. In such cases, other types of drill bits, like Forstner bits or auger bits, may be more appropriate despite their slower drilling speed. Ultimately, the purpose of using a spade drill bit depends on the specific requirements of the project, balancing the need for speed and efficiency against the need for precision and finish quality.
Common Applications
- Electrical Wiring2: Creating channels for wires.
- Plumbing: Drilling holes for pipes.
- Shelving: Installing supports and brackets.
When to Avoid Spade Bits
- Precision Work: When exact hole placement is crucial.
- High-Quality Finish: Projects requiring smooth and clean holes.
- Thin Materials: Risk of splitting the wood.
Forstner on An Angle?
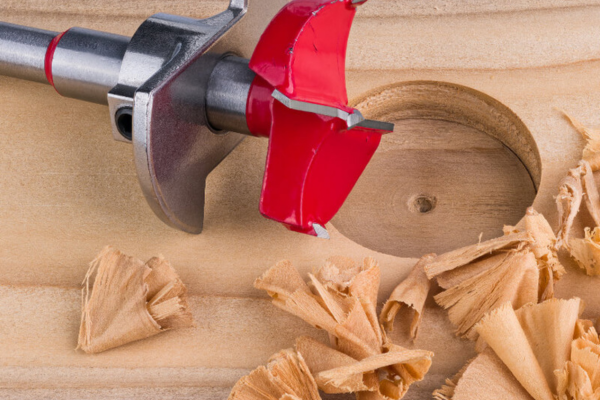
Can you effectively use a Forstner bit at an angle, and what are the benefits?
Using a Forstner bit at an angle allows for angled holes, providing greater flexibility and precision in woodworking projects.
Let’s explore the techniques and advantages of angling Forstner bits in your work.
Forstner bits are renowned for their ability to create precise, clean, and flat-bottomed holes, making them a favorite among woodworkers for tasks that demand high accuracy. One of the advanced techniques that can enhance the versatility of Forstner bits is drilling at an angle. Using a Forstner bit at an angle allows woodworkers to create angled holes, which can be essential for joinery, aesthetic detailing, or accommodating specific design requirements. To effectively use a Forstner bit at an angle, it’s important to stabilize the workpiece and ensure that the drill is held firmly to maintain the desired angle throughout the drilling process. Clamps and jigs can be helpful in securing the material and guiding the drill to achieve consistent results. Angling the Forstner bit can also help in creating overlapping holes or mortises that align with other components of the project, enhancing the structural integrity and visual appeal of the final product. Additionally, drilling at an angle can reduce the risk of tear-out, especially when working with hardwoods or veneers, as the controlled approach of the Forstner bit minimizes splintering and ensures a smooth entry and exit. However, drilling at an angle requires a steady hand and a good understanding of the bit’s behavior to avoid misalignment or bit deflection. Practicing on scrap material before applying the technique to the actual project can help in mastering the skill. The benefits of using a Forstner bit at an angle extend beyond mere functionality; they allow for creative expression and the ability to tackle more complex woodworking challenges with confidence. By incorporating angled drilling techniques, woodworkers can expand their repertoire of skills and produce more intricate and refined pieces.
Techniques for Angled Drilling
- Stabilize the Workpiece: Use clamps to secure the material.
- Use a Drill Guide3: Helps maintain the desired angle.
- Practice on Scrap Wood: Ensures accuracy before drilling the actual piece.
Benefits of Angled Forstner Drilling
- Enhanced Joinery: Creates precise angled joints.
- Aesthetic Flexibility: Adds unique design elements.
- Reduced Tear-Out: Minimizes splintering for cleaner holes.
Potential Challenges
- Bit Alignment: Maintaining the correct angle can be difficult.
- Bit Stability: Ensuring the bit doesn’t wobble during drilling.
- Material Restrictions: Some materials may be harder to drill at an angle.
Conclusion
Choosing the right bit between Forstner and spade depends on your project needs.

