

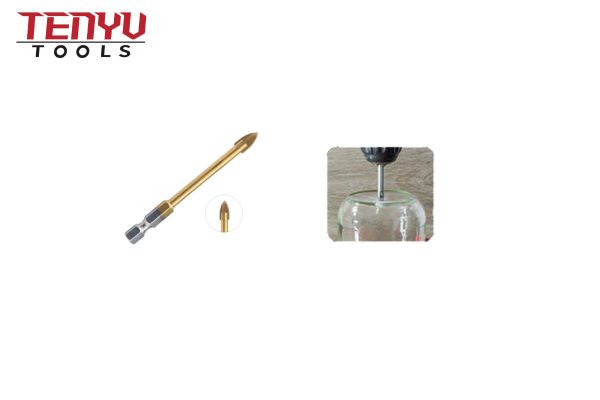
Drilling through glass can be tricky, but using carbide tip drill bits makes it easier.
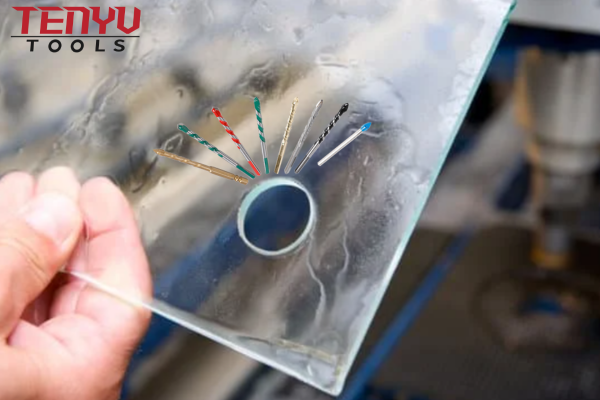
Carbide tip drill bits offer durability and precision, making them ideal for drilling glass without causing damage.
Stay with me as we explore how carbide tip drill bits can make your glass drilling projects successful.
How to Drill Through Glass?

Drilling through glass requires the right tools to avoid cracks and breaks.
Using carbide tip drill bits ensures clean and precise holes in glass, minimizing the risk of damage.
Let’s delve into the step-by-step process of drilling glass with carbide tip drill bits to achieve the best results.
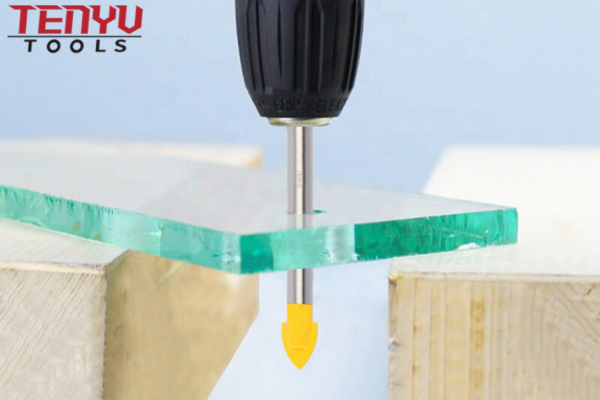
Step-by-Step Process
Drilling through glass with carbide tip drill bits involves several careful steps to ensure a smooth and safe process. First, gather all necessary tools: a carbide tip drill bit, a drill with variable speed settings, masking tape, and safety gear such as goggles and gloves. Begin by placing masking tape on the glass where you plan to drill. This tape helps prevent the drill bit from slipping and provides a clear guide for your drilling. Mark the exact spot with a marker for precision. Set your drill to a low speed to start, which helps create an initial groove without putting too much stress on the glass. Apply gentle and steady pressure as you drill, allowing the carbide tip to do the work without forcing it. Keep the drill bit and glass cool1 by continuously applying water, which prevents overheating and reduces the chance of cracking. As you drill deeper, maintain a consistent speed and pressure, gradually increasing the depth of the hole. Once the hole is complete, slowly remove the drill bit while continuing to apply water to ensure a clean finish. Finally, inspect the drilled area for any sharp edges and smooth them out if necessary.
Tools and Materials Needed
| Tool | Purpose |
|---|---|
| Carbide Tip Drill Bit | Provides durability and precision for drilling glass |
| Variable Speed Drill | Allows control over drilling speed |
| Masking Tape | Prevents drill bit from slipping |
| Safety Goggles | Protects eyes from glass shards |
| Gloves | Protects hands from sharp edges and fragments |
| Water Source | Cools the drill bit and glass to prevent overheating |
How to Drill through Glass without Breaking It?
Breaking glass while drilling can ruin your project and pose safety hazards.
Using carbide tip drill bits with proper techniques ensures you drill through glass smoothly without causing breaks.
Let’s explore the techniques to achieve a clean drill through glass using carbide tip drill bits.
Techniques for Success
Achieving a clean drill through glass without breaking it involves meticulous attention to detail and the right use of carbide tip drill bits2. Start by selecting a high-quality carbide tip drill bit, which is specifically designed to handle the hardness of glass. Apply masking tape to the drilling spot to provide traction and prevent the drill bit from wandering. Mark the exact spot where you want to drill to ensure accuracy. Begin drilling at a low speed to create an initial groove, allowing the carbide tip to establish a stable path. This groove acts as a guide, helping the drill bit stay steady as you continue. Consistently apply water to the drilling area to lubricate the glass and dissipate heat, reducing the risk of cracking. Maintain a firm but gentle pressure, letting the carbide tip gradually penetrate the glass. Patience is essential; rushing the process can lead to uneven drilling and potential breakage. Once the groove is sufficiently deep, you can slowly increase the drilling speed while maintaining control to complete the hole. After drilling, carefully remove any residual glass fragments and smooth the edges to prevent injury.
Common Mistakes to Avoid
Avoiding common mistakes is crucial for drilling glass successfully with carbide tip drill bits. One frequent error is applying excessive pressure, which can cause the glass to crack. Instead, let the carbide tip do the work with minimal force. Another mistake is neglecting to use lubrication; dry drilling generates heat that weakens the glass structure. Ensure a continuous water flow to keep both the drill bit and glass cool. Starting at too high a speed can lead to uncontrolled drilling, so always begin at a lower speed to establish a stable groove. Additionally, not securing the glass properly can result in movement during drilling, increasing the likelihood of breakage. Use clamps or a stable work surface to keep the glass steady throughout the process. Another common mistake is using the wrong type of drill bit; carbide tip bits are essential for their durability and precision. Using inappropriate bits can lead to poor results and potential damage to the glass. Finally, failing to inspect the drilled hole for sharp edges can result in injuries or compromised functionality of the drilled glass piece.
How Can You Cut a Glass Bottle at Home?
Cutting a glass bottle at home can be made easier with the right tools, including carbide tip drill bits.
Carbide tip drill bits provide the precision needed to score and cut glass bottles cleanly and safely.
Let’s break down the process of cutting a glass bottle at home using carbide tip drill bits.
Materials and Tools Required
Cutting a glass bottle at home requires specific materials and tools to ensure a clean and safe cut. Start with a carbide tip drill bit, which is essential for scoring the glass accurately. A glass cutter3 is also useful for creating an initial score line. Masking tape or a template helps guide your cutting and prevents the glass from slipping. You will need boiling water and cold water for the heating and cooling process, which assists in breaking the glass cleanly along the scored line. Protective gloves and safety goggles are crucial to protect yourself from sharp edges and potential glass shards. A sanding block or sandpaper will be necessary to smooth out the edges after cutting. Additionally, a stable work surface is important to securely hold the bottle during the cutting process. Optionally, a glass bottle cutter kit can provide more control and precision, especially for those who are new to glass cutting.
Step-by-Step Cutting Process
Begin by thoroughly cleaning the glass bottle to remove any labels or residues that might interfere with the cutting process. Once the bottle is clean, wrap masking tape around the area where you intend to make the cut. This tape provides stability and helps prevent the glass from slipping while drilling. Using a carbide tip drill bit, create a series of small holes along the intended cut line. These holes will serve as weak points where the glass can break more easily. After drilling, use a glass cutter to score a straight line through the drilled holes, ensuring a consistent and even score. Carefully pour boiling water over the scored line, allowing the glass to heat evenly. Immediately follow by pouring cold water over the same area to create a thermal shock, causing the glass to crack along the scored line. Gently bend the bottle in opposite directions to separate the cut piece. Once separated, use a sanding block or sandpaper to smooth out any sharp edges, making the cut glass safe to handle. For a more polished finish, you can use a rotary tool with a grinding attachment to refine the edges further, ensuring a professional and clean appearance.
Safety Precautions
Safety is paramount when cutting glass bottles at home, especially when using carbide tip drill bits. Always wear protective gloves and safety goggles to shield yourself from sharp edges and potential glass fragments. Ensure you are working in a well-ventilated area to avoid inhaling any glass dust generated during sanding. When handling boiling and cold water, do so carefully to prevent burns or thermal shock injuries. Secure the bottle firmly on a stable surface during the cutting process to minimize movement and reduce the risk of accidental breakage. Keep a first aid kit nearby in case of minor injuries. Additionally, work slowly and methodically to maintain control over the cutting process, allowing the carbide tip drill bit to score and create precise weak points for breaking the glass. Avoid rushing the process, as hasty actions can lead to uneven cuts and potential injuries. Properly disposing of any broken glass pieces is also important to maintain a safe working environment.
How to Cut Window Glass at Home?
Cutting window glass at home requires precision, and carbide tip drill bits can significantly enhance accuracy.
Carbide tip drill bits provide the necessary durability and precision for cutting window glass cleanly and safely.
Let’s explore the essential steps and tips for successfully cutting window glass using carbide tip drill bits.
Essential Tools and Materials
Cutting window glass at home necessitates specific tools and materials to ensure accuracy and safety. Start with a high-quality carbide tip drill bit, which is essential for making precise scores on the glass. A glass cutter is also useful for initiating the cut. A straight edge, such as a metal ruler or a dedicated glass cutting guide, helps maintain a straight line during the cutting process. Masking tape can be used to mark the cutting line and prevent the glass from slipping. Protective gloves and safety goggles are non-negotiable to protect against sharp edges and potential glass shards. A cutting oil or lubricant will aid in achieving a smoother score and reduce the risk of the glass cracking prematurely. Additionally, having a stable work surface, like a cutting table with a sacrificial surface, ensures the glass remains steady while you work. For larger or more intricate cuts, a rotary tool4 with a carbide tip attachment can provide additional control and precision.
Detailed Cutting Procedure
Begin by thoroughly cleaning the window glass to remove any dust or debris that could interfere with the cutting process. Measure and mark the exact area you wish to cut, using masking tape to outline the cutting line for added stability. Position the straight edge along the marked line to guide the carbide tip drill bit accurately. Hold the drill firmly and apply consistent pressure as you drag the carbide tip along the straight edge, creating a continuous score line. The carbide tip ensures a precise and deep score, which is essential for a clean break. Once the score is complete, place the glass over a secure edge or a straight-edge table. Gently apply downward pressure on both sides of the score line to encourage the glass to break cleanly along the score. If the glass does not break smoothly, use a glass breaker tool or gently tap the score line with a rubber mallet to assist in the break. After successfully cutting the glass, use sandpaper or a glass smoothing tool to smooth out any sharp or uneven edges, ensuring the cut glass is safe to handle and install. For a more polished finish, a rotary tool with a grinding attachment can be used to refine the edges further, providing a professional and clean appearance.
Troubleshooting Common Issues
When cutting window glass at home, you may encounter several common issues that can hinder the process. One frequent problem is uneven scoring, which can lead to jagged or uncontrolled breaks. To avoid this, ensure you maintain a consistent pressure and speed while scoring with the carbide tip drill bit, and use a straight edge to guide the cutter accurately. Another issue is the glass cracking prematurely during the scoring process. This can be mitigated by applying lubrication, such as cutting oil, to the cutter and the glass to reduce friction and heat buildup. If the glass does not break along the score line, double-check the score for depth and consistency, and consider using a glass breaking tool to assist in the process. Additionally, improperly secured glass can shift during cutting, resulting in inaccurate cuts. Always secure the glass firmly on a stable surface before beginning to cut, ensuring it remains steady throughout the process. Handling large or thick glass can be challenging; in such cases, consider seeking assistance or using specialized tools to manage the increased difficulty safely. Another common issue is the drill bit overheating, which can cause the glass to crack. To prevent this, continuously apply water to cool both the drill bit and the glass during the cutting process. Ensuring proper cooling helps maintain the integrity of the glass and allows for a cleaner, more controlled cut.
Conclusion
Using carbide tip drill bits makes drilling and cutting glass precise and safe.
-
Cooling drill bits with water is critical to prevent overheating and cracking, particularly in glass drilling. ↩
-
This link will provide details on why carbide tip drill bits are specifically suited for drilling glass. ↩
-
A glass cutter is a critical tool for creating the initial score line on the glass. ↩
-
A rotary tool with a carbide tip attachment is a specialized tool for making intricate cuts. ↩