Have you ever struggled with inaccurate holes in your woodworking projects?
Using Brad Point Drill Bits correctly ensures precise and clean holes every time, enhancing the quality of your woodworking.
Let’s explore the best practices to make the most out of your brad point drill bits.
What is Brad Point Drill Bit Set?
Are your drill bits leaving your projects looking rough and unfinished?
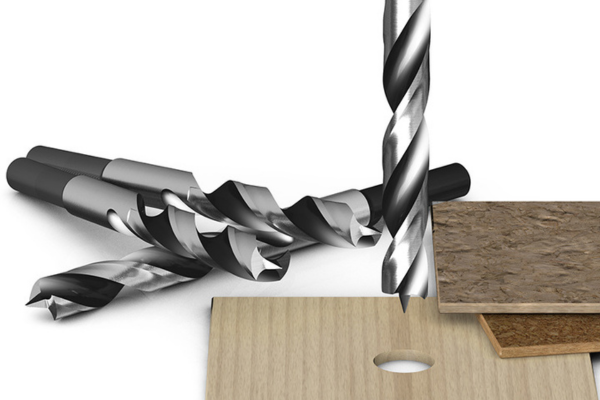
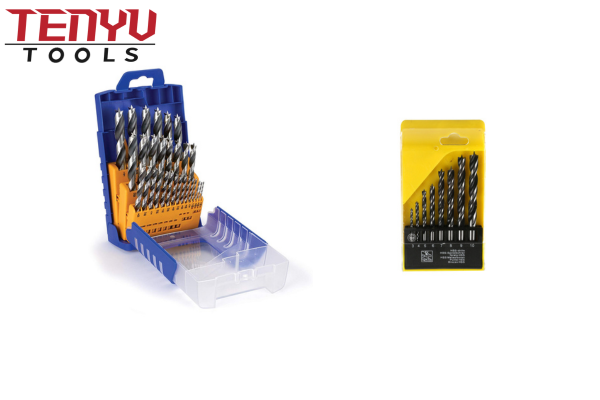
A Brad Point Drill Bit Set is specifically designed for woodworking, providing clean and accurate holes with minimal splintering.
Understanding the tools you use is essential for achieving professional results in your woodworking projects.
What Makes Brad Point Drill Bits Unique?
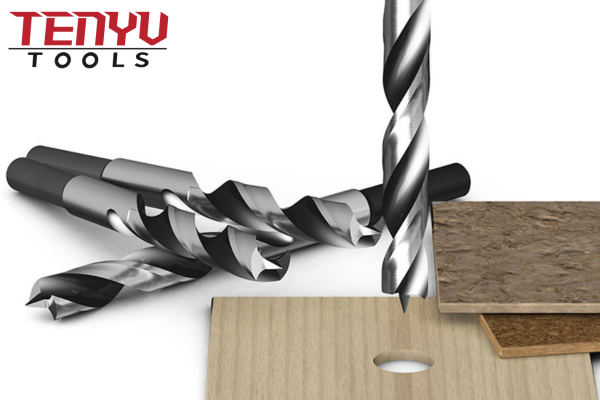
Brad Point Drill Bits1 have a sharp point in the center that helps guide the bit precisely into the wood. The outer edges are designed with spurs that score the wood, ensuring clean and accurate holes.
Features of Brad Point Drill Bits
| Feature | Description |
|---|---|
| Center Sharp Point | Guides the bit accurately into the wood |
| Outer Spurs | Score the wood to prevent splintering |
| Flute Design | Efficiently removes wood chips for smoother drilling |
| Material | Typically made from high-speed steel for durability |
Benefits of Using Brad Point Drill Bits
Using Brad Point Drill Bits offers several advantages:
- Precision: The sharp center point ensures the bit starts exactly where you want.
- Clean Holes: Outer spurs prevent the wood from splintering, resulting in smooth edges.
- Versatility: Suitable for various woodworking tasks, from cabinetry to furniture making.
- Durability: High-quality materials ensure the bits last longer, providing better value over time.
How to Choose the Right Brad Point Drill Bit Set
When selecting a Brad Point Drill Bit Set, consider the following:
- Material Quality: Look for bits made from high-speed steel or carbide-tipped for longevity.
- Size Range: Ensure the set includes the sizes you need for your projects.
- Brand Reputation: Choose reputable brands known for producing reliable and precise tools.
- Price vs. Quality: Balance your budget with the quality to get the best value for your money.
Investing in a quality Brad Point Drill Bit Set can significantly improve the outcome of your woodworking projects, making your work more efficient and professional.
What Tools do I Need to Start Woodworking at Home?
Feeling overwhelmed by the number of tools needed to start woodworking?
Starting woodworking at home requires a basic set of essential tools to ensure you can handle a variety of projects effectively.
Having the right tools not only makes the process easier but also enhances the quality of your work.
Essential Tools for Beginner Woodworkers
When starting out, focus on acquiring the following essential tools:
-
Measuring Tools
- Tape Measure: For accurate measurements.
- Combination Square: For marking and measuring angles.
- Marking Gauge: For precise marking of lines.
-
Cutting Tools
- Hand Saw: For basic cutting tasks.
- Circular Saw: For making straight cuts quickly.
- Brad Point Drill Bits2: For accurate drilling in wood.
-
Shaping Tools
- Chisels: For carving and shaping wood.
- Hand Plane: For smoothing and leveling surfaces.
-
Joining Tools
- Clamps: Essential for holding pieces together while glue dries.
- Hammer: For driving nails and assembling pieces.
-
Power Tools
- Power Drill: For drilling holes and driving screws.
- Jigsaw: For making curved and intricate cuts.
-
Safety Gear
- Safety Glasses: To protect your eyes.
- Hearing Protection: To protect your ears from loud noises.
- Dust Masks: To prevent inhalation of sawdust and debris.
Building Your Workshop
Creating a dedicated workspace is crucial for efficient woodworking. Here are some tips:
- Space Allocation: Ensure you have enough space to move around and safely store your tools.
- Lighting: Good lighting is essential for precision and safety.
- Ventilation: Proper ventilation helps manage dust and fumes from materials and finishes.
- Storage Solutions: Use shelves, pegboards, and cabinets to keep your tools organized and accessible.
Budgeting for Your Woodworking Tools
Starting with essential tools doesn’t have to break the bank. Here’s how to budget effectively:
- Prioritize Quality: Invest in high-quality tools for tasks you perform frequently.
- Buy in Stages: Start with the most essential tools and gradually add more as your projects expand.
- Look for Deals: Take advantage of sales, discounts, and second-hand tools in good condition.
- Consider Multi-Functional Tools: Tools that serve multiple purposes can save space and money.
Expanding Your Tool Collection
As you gain experience, you may want to expand your tool collection to tackle more complex projects:
- Router: For creating decorative edges and joints.
- Table Saw: For precise and large-scale cutting tasks.
- Planer: For achieving perfectly smooth and even surfaces.
- Lathe: For turning and shaping wood into cylindrical forms.
Having a well-rounded set of tools allows you to explore various woodworking techniques and enhance your craftsmanship.
What are the Best Woodworking Tools for Beginners?
Are you unsure which tools to invest in as a woodworking beginner?
The best woodworking tools for beginners are those that are versatile, easy to use, and essential for a wide range of projects.
Choosing the right tools can make your entry into woodworking smooth and enjoyable.
Top Recommended Tools for Beginners
Here are some of the best tools that every beginner woodworker should consider:
-
Combination Square
- Purpose: For measuring and marking right angles.
- Why It’s Essential: Ensures accuracy in your measurements and cuts.
-
Claw Hammer
- Purpose: For driving and removing nails.
- Why It’s Essential: Fundamental for assembling and disassembling wood pieces.
-
Tape Measure
- Purpose: For taking precise measurements.
- Why It’s Essential: Accuracy is critical in all woodworking projects.
-
Hand Saw
- Purpose: For making manual cuts in wood.
- Why It’s Essential: Versatile for various cutting needs without electricity.
-
Cordless Drill
- Purpose: For drilling holes and driving screws.
- Why It’s Essential: Increases efficiency and versatility in your work.
-
Chisel Set
- Purpose: For carving and shaping wood.
- Why It’s Essential: Essential for detailed work and finishing touches.
-
Workbench
- Purpose: For providing a stable surface to work on.
- Why It’s Essential: Enhances productivity and safety while working.
Investing in Quality Tools
While it might be tempting to buy cheaper tools, investing in quality tools can save you money in the long run:
- Durability: Quality tools last longer and withstand regular use without breaking.
- Performance: High-quality tools perform better, making your work easier and more precise.
- Safety: Reliable tools reduce the risk of accidents and injuries in the workshop.
Essential Power Tools for Beginners
In addition to manual tools, having a few power tools can greatly enhance your woodworking capabilities:
-
Circular Saw
- Use: Making straight cuts quickly and accurately.
- Benefit: Speeds up the cutting process compared to manual saws.
-
Power Drill
- Use: Drilling holes and driving screws with ease.
- Benefit: Increases efficiency and allows for more precise work.
-
Jigsaw
- Use: Making curved and intricate cuts.
- Benefit: Adds versatility to your cutting capabilities.
Building a Solid Foundation
Starting with these essential tools sets a strong foundation for your woodworking journey. As you gain experience, you can gradually expand your toolkit to include more specialized tools tailored to your specific projects and interests.
How to Cut a Circle in Wood with a Drill?
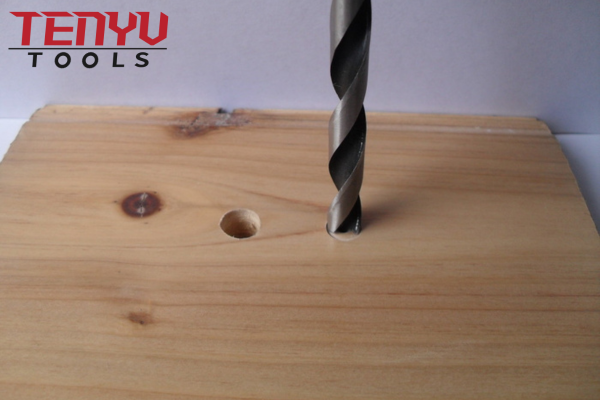
Struggling to make perfect circular cuts in your wood projects?
Cutting a circle in wood with a drill requires the right technique and tools to achieve smooth and accurate results.
Mastering this skill opens up a variety of creative woodworking possibilities.
Tools and Materials Needed
To cut a circle in wood with a drill, you will need the following:
- Drill: A standard power drill will work.
- Brad Point Drill Bit3: For precise drilling.
- Compass or Circle Cutting Jig: To guide the drill.
- Pencil: For marking the circle.
- Sandpaper: For smoothing the edges after cutting.
- Clamps: To secure the wood piece in place.
- Safety Gear: Safety glasses and gloves.
Step-by-Step Guide to Cutting a Circle
-
Mark the Circle
- Use a compass or a circle cutting jig to draw the desired circle on the wood.
- Ensure the mark is clear and precise for accurate cutting.
-
Prepare the Drill
- Attach the Brad Point Drill Bit to your drill.
- Set the drill to a moderate speed to maintain control during the cut.
-
Drill a Pilot Hole
- Place the drill bit at the center of the marked circle.
- Drill a hole that is slightly larger than the width of the jigsaw blade.
- This hole will serve as the starting point for cutting the circle.
-
Insert the Jigsaw Blade
- Insert the jigsaw blade into the pilot hole.
- Ensure the blade is securely in place before beginning to cut.
-
Cut the Circle
- Slowly guide the jigsaw along the marked line.
- Keep the blade perpendicular to the wood to maintain a clean cut.
- Move steadily to avoid tearing the wood.
-
Smooth the Edges
- After cutting, use sandpaper to smooth any rough edges.
- Ensure the circle is clean and free of splinters.
Tips for a Successful Circular Cut
- Use Sharp Tools: Ensure your drill bit and jigsaw blade are sharp for clean cuts.
- Secure the Wood: Clamping the wood firmly prevents movement and enhances accuracy.
- Go Slow: Cutting too quickly can result in uneven edges and splintering.
- Practice First: Try cutting circles on scrap wood to get a feel for the process before working on your actual project.
Common Mistakes to Avoid
- Incorrect Drill Bit Size: Using a drill bit that is too large or too small can affect the accuracy of the cut.
- Poor Marking: Inaccurate markings lead to imperfect circles. Take your time to mark clearly.
- Rushing the Cut: Cutting too fast can cause the jigsaw to veer off the line, resulting in an uneven circle.
- Neglecting Safety: Always wear safety gear to protect yourself from dust and debris.
Enhancing Your Circular Cutting Skills
Mastering the technique of cutting circles in wood with a drill and jigsaw can significantly enhance your woodworking projects. Practice regularly, invest in quality tools, and pay attention to detail to achieve professional results every time.
Conclusion
Mastering the use of Brad Point Drill Bits enhances your woodworking precision and quality.

